Testing custom tokens
Testing your custom tokens can be achieved in many ways. The most obvious way is to send your notification over and over again until you get the desired result. However, this seems very cumbersome and so Notification Center Pro comes with a test mode:
Custom tokens are always an extension to a given token collection which you cannot influence. For example,
the notification type Contao form generator submission provides all form fields as well as form configuration
information as tokens. What you can do with custom tokens now is to add additional tokens based on those tokens.
So for testing, you need to give the Notification Center Pro a token collection to work with.
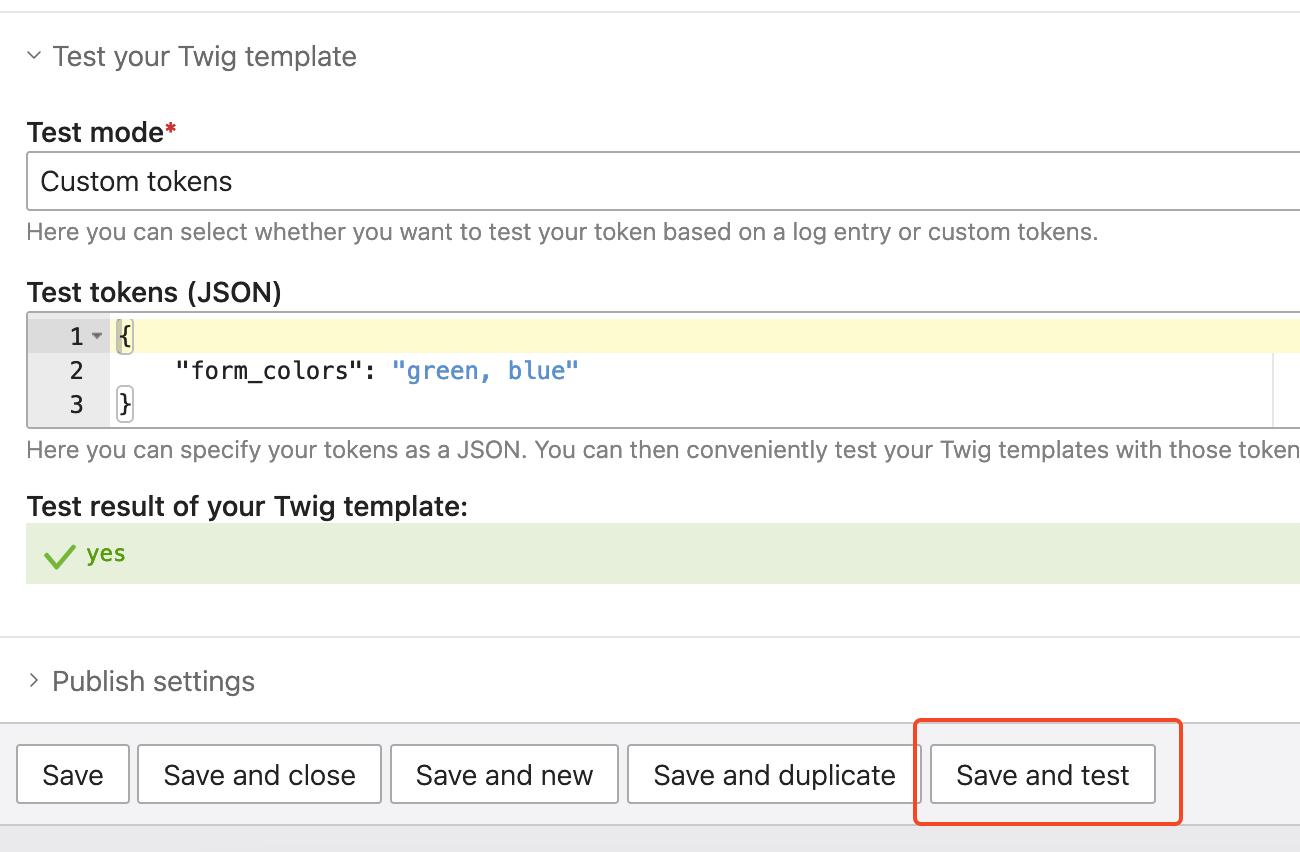
As you can see from this screenshot, there are two testing modes:
- Testing based on your own token collection.
This can be very handy for super simple use cases. If for example, your form is very short, and you know exactly what values will be provided, this is a very quick way to test things. - Testing based on a log entry.
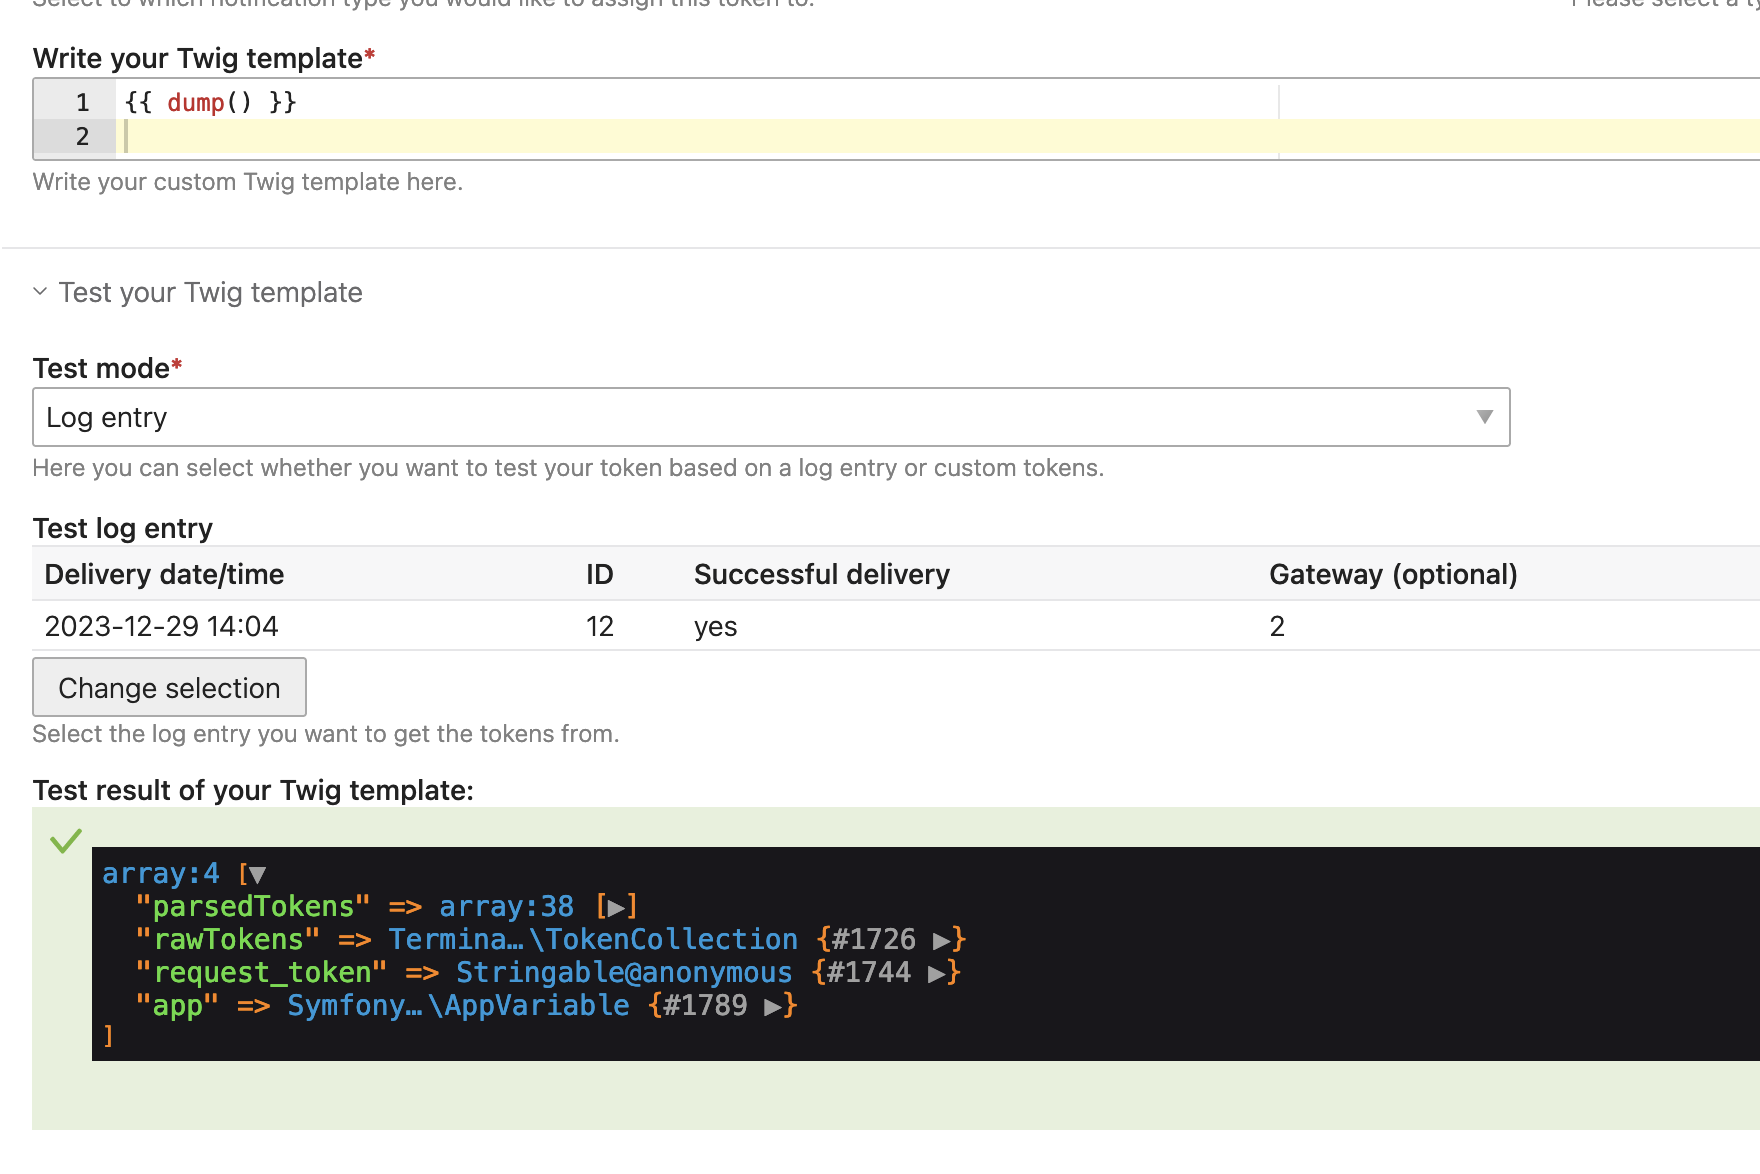
Imagine you have a form (or any notification type) with lots of tokens. Maybe a form with 30 form fields. It would be super cumbersome to create those testing tokens manually. So instead of doing that, you can also test your custom token based on a log entry.
Using the Void Gateway
Use the Void Gateway provided by Notification Center Pro to generate a log entry, which you can then use for
testing your custom tokens. The Void Gateway behaves exactly like any other gateway, but it does not actually send
the notification. It will, however, generate a regular log entry as if the notification were sent. This allows you
to very easily generate a few test cases based on which you can then create and test your custom tokens.
Debugging
Warning
The following manual only works if you are in Contao debug mode!
Use {{ dump() }} as your Twig template. You will then be able to easily inspect both, the parsedTokens as well
as the rawTokens: